In the spring of 2015 I received brand new square tables for my classroom and turned the tops into whiteboard tables. It was a game-changer that I stole from Reuben Hoffman at my school. These tables were gold for promoting student-to-student discussion by throwing content directly onto the examination table in front of them. It was also a critical move in de-fronting my classroom.
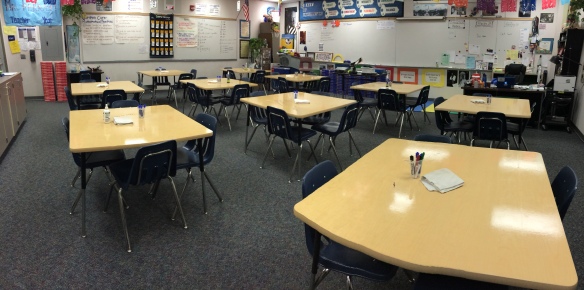
Early iteration of my 10 tables
Here’s how to do it. I had 10 tables.
1) Buy the whiteboard paint. I got mine at HomeDepot and got the clear kind. Each box cost about $20. I used 3 boxes. Read the directions carefully, especially with the type of roller to use. Also, touch-ups aren’t pretty. When I was leaving for the day a gnat got stuck in the paint. I basically gouged it out, had to repaint that area, and now it’s a bumpy mess resembling shiny gauze that only inspires “what happened here?” questions from students.


I spent one afternoon doing the first coat then came in on the weekend to do the second coat. The biggest issue was choosing a time long enough without students present.

2) Buy a few rolls of Velcro that can be cut to size.
3) Buy microfiber rags. I prototyped other rags but found the microfiber ones could stick to the velcro that I attached to the underside of each of the four corners. I got a big pack from Home Depot and had a student sew the ends so they wouldn’t fray. Thanks, Barbra!
4) Buy one Expo spray bottle of whiteboard cleaner for each table. I then refilled them from a gallon size bottle. One jug has lasted more than a year.

Every corner has a rag, but only two legs per table have cups.
5) Buy relatively sturdy cups to affix to opposite ends of the table. In this way every student can reach either left or right and find a marker. That’s two cups per table. No matter the cup, they’ve all been smashed enough to need replacing periodically. Replacing the cups takes more Velcro obviously.
6) Buy at least 4 Expo markers per table, two for each cup. This is the priciest piece of maintaining the tables. Students like to COLOR on the tables. They like to DRAW on the tables. They like to DOODLE on the tables. Although this eats up the markers, the price pales in comparison to the effect the tables had in class for getting students talking about the math!


Did I really need to make rules? The first two days I had the tables, I made no rules about using the tables. I wanted to see what students did and if there was really a need to have rules. The last thing I wanted was to crush student freedom right way. So I gave myself a time period to observe student behavior and came up with these guidelines:
- Limit coloring.
- Erase your table at the end of class.
- Put the rags and markers back at the end of class.
Generally speaking these guidelines were sufficient.


Next step…vertical non-permanent surfaces (VNPS) around the room that I learned about from Alex Overwijk. The research of VNPS will blow your mind. Moreover, Ed Campos Jr. is making it a habit to customize every classroom he occupies and it is inspiring! Think of Pimp My Ride takes on the math classroom.
I’d like to hear how you’re using whiteboard table tops and other classroom redesigning you’ve done.

Pingback: Back to School: Let’s Do This. / Global Math Department
How long did it take to dry?